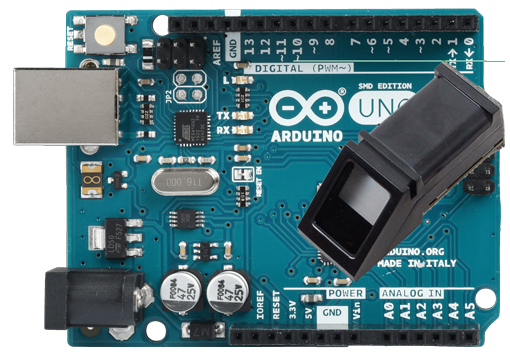
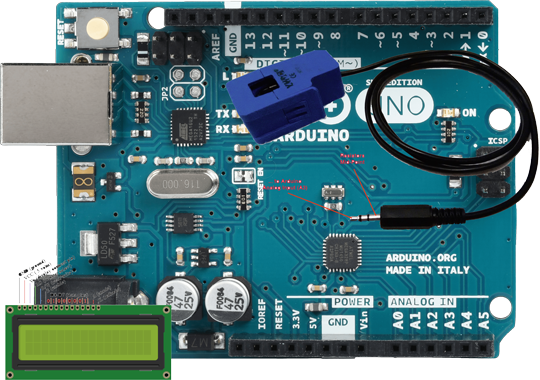
Arduino
Maitriser la lecture des empreintes digitales (DY50).
Publié le 28/04/2019
Le but de cet article est de lire une empreinte digitale, de vérifier quelle correspond bien à une empreinte valide (enregistrée dans le lecteur).
Si elle est valide, on affiche un message de bienvenue à l'utilisateur, et une LED clignote pour lui signifier qu'il a bien été reconnu.
Le lecteur d'empreinte peut stocker une centaine d'empreintes.
Le lecteur peut être un peu capricieux et nécessite une pose correcte du doigt.
ATTENTION, dans cette publication nous manipulons du 220V ce qui peut être mortel !!! Les risques sont réels ! Vous le faites sous votre responsabilité.
Débranchez avant toute manipulation, rendez impossible l'accès aux contacts (boîte étanche)…
Afin de gérer le lecteur d'empreinte, il est nécessaire d'installer la librairie Adafruit Fingerprint Sensor Library by Adafruit V1.1.2.
Dans la vidéo, on peut voir un utilisateur mettre un doigt non enregistré, et on peut voir que le lecteur ne l'accepte pas. Puis on voit l'utilisateur mettre un doigt valide...

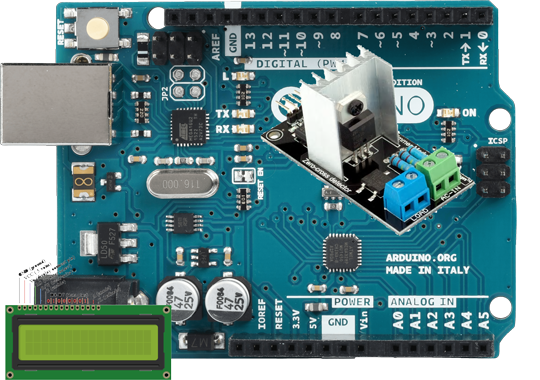
Liste des composants nécessaires pour la réalisation du circuit :
- Arduino Uno1
- Résistance 200 Ohms3
- DY501
- LED1
- Transistor1
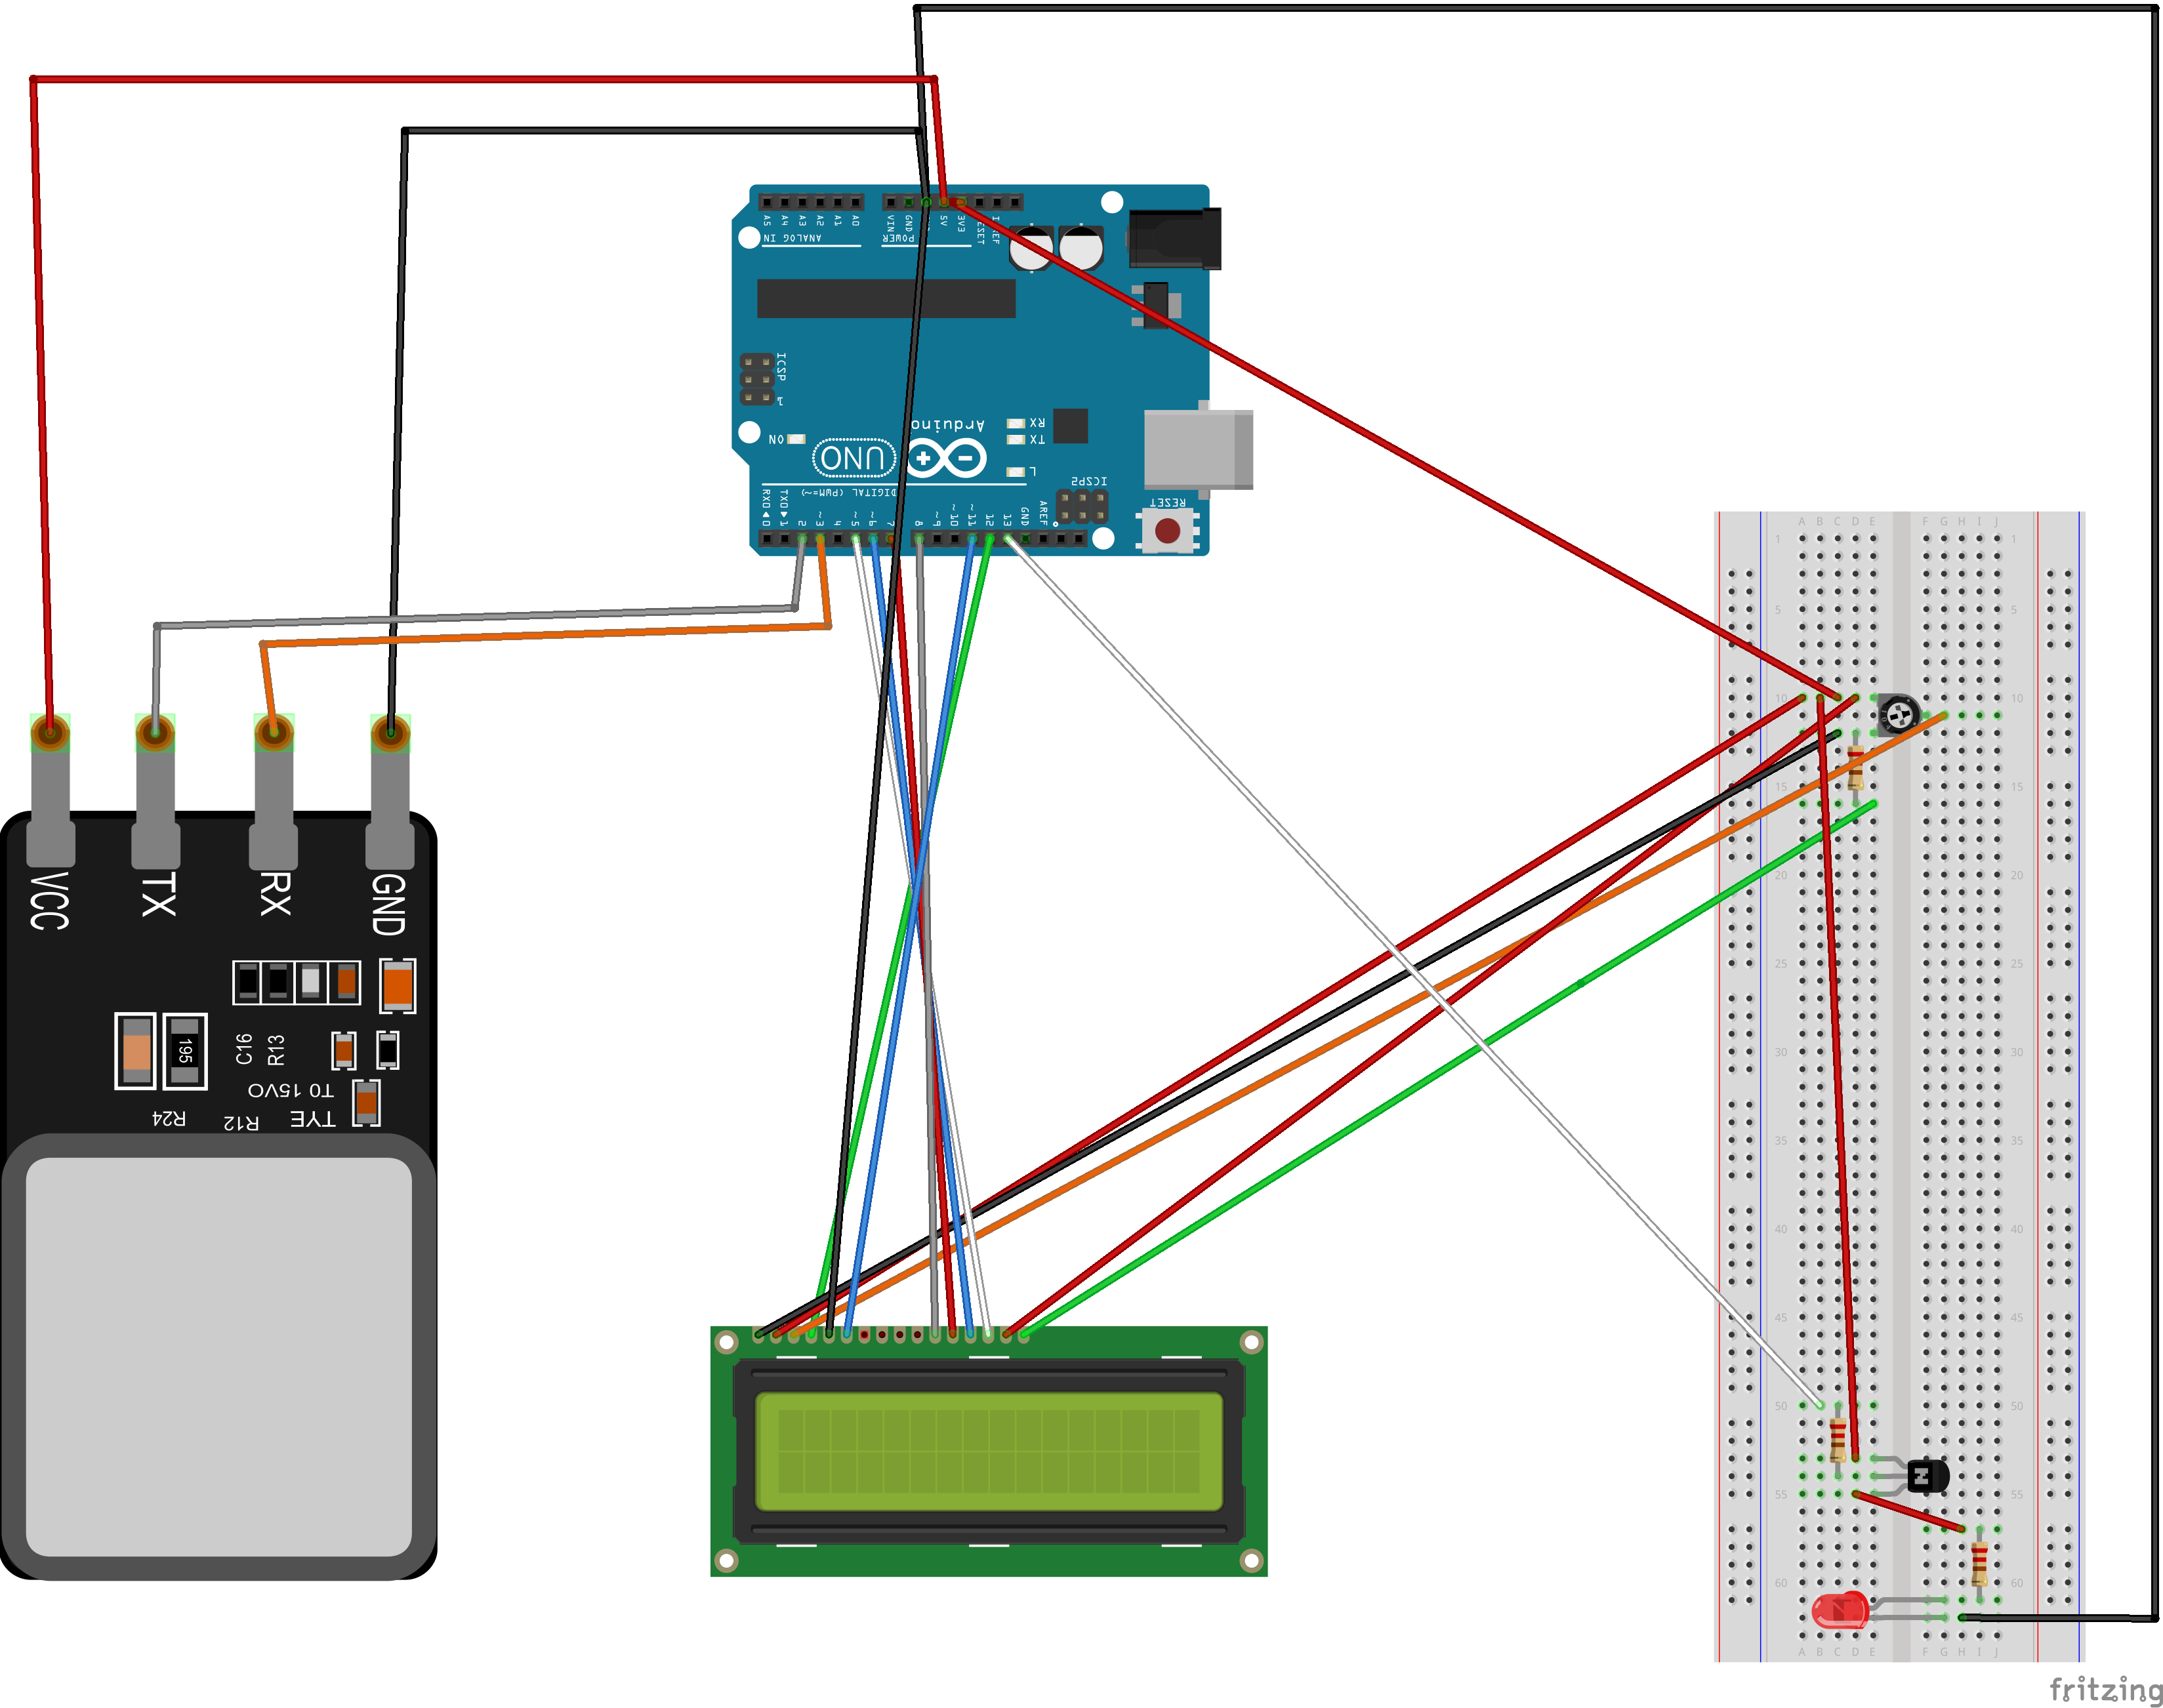
Schéma du montage électronique :
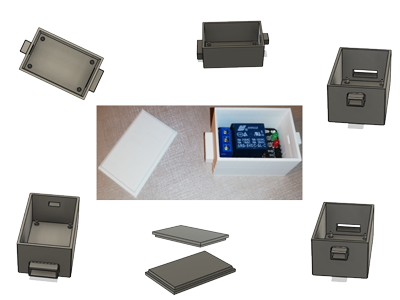
Pour les amateurs d'impression 3D, j'ai fait quelques templates qui permettent d'imprimer divers boitiers pouvant accueillir les divers composants utilisés dans mes tutoriels.
- Pour un composant PIR, vous trouverez le boitier à imprimer ici.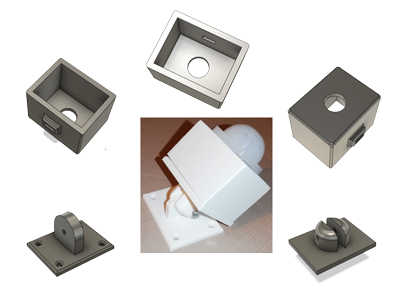
Il faut compter environ 4h pour imprimer les composants de ce boitier.
- Pour un relais, vous trouverez le boitier à imprimer ici.
Il faut compter environ 2h pour imprimer les composants de ce boitier.
L'ensemble des impressions 3D a été réalisé sur une imprimante Creality3D Ender-3 pro avec les réglages standards suivants: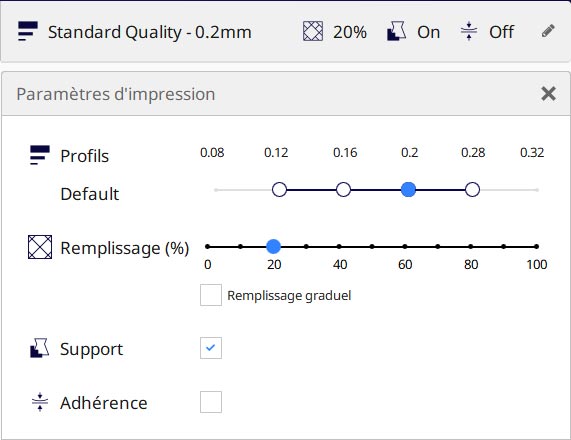
Pour les personnes possédant Fritzing, voici le schéma électronique.
Voici le code à télécharger dans votre Arduino:
/***************************************************
  This is an example sketch for our optical Fingerprint sensor

  Designed specifically to work with the Adafruit BMP085 Breakout
  ----> http://www.adafruit.com/products/751

  These displays use TTL Serial to communicate, 2 pins are required to
  interface
  Adafruit invests time and resources providing this open source code,
  please support Adafruit and open-source hardware by purchasing
  products from Adafruit!

  Written by Limor Fried/Ladyada for Adafruit Industries.
  BSD license, all text above must be included in any redistribution
 ****************************************************/


#include
#include

// On Leonardo/Micro or others with hardware serial, use those! #0 is green wire, #1 is white
// uncomment this line:
// #define mySerial Serial1

// For UNO and others without hardware serial, we must use software serial...
// pin #2 is IN from sensor (GREEN wire)
// pin #3 is OUT from arduino  (WHITE wire)
// comment these two lines if using hardware serial
SoftwareSerial mySerial(2, 3);

// initialize the library by associating any needed LCD interface pin
// with the arduino pin number it is connected to
const int rs = 12, en = 11, d4 = 8, d5 = 7, d6 = 6, d7 = 5, transistor=13;
LiquidCrystal lcd(rs, en, d4, d5, d6, d7);

Adafruit_Fingerprint finger = Adafruit_Fingerprint(&mySerial);

void setup()
{
  pinMode(transistor, OUTPUT);
  digitalWrite(transistor, LOW);

  Serial.begin(9600);
  while (!Serial);  // For Yun/Leo/Micro/Zero/...
  delay(100);
  Serial.println("\n\nAdafruit finger detect test");

  // set up the LCD's number of columns and rows:
  lcd.begin(16, 2);

  // Turn off the display:
  lcd.noDisplay();

  lcd.display();

  // Print a message to the LCD.
  lcd.print("hello, world!");

  // set the data rate for the sensor serial port
  finger.begin(57600);

  if (finger.verifyPassword()) {
    Serial.println("Found fingerprint sensor!");
  } else {
    Serial.println("Did not find fingerprint sensor :(");
    while (1) { delay(1); }
  }

  finger.getTemplateCount();
  Serial.print("Sensor contains "); Serial.print(finger.templateCount); Serial.println(" templates");
  Serial.println("Waiting for valid finger...");


  digitalWrite(transistor, HIGH);
}

void loop()                     // run over and over again
{
  getFingerprintIDez();
  delay(50);            //don't ned to run this at full speed.
}

uint8_t getFingerprintID() {
  uint8_t p = finger.getImage();
  switch (p) {
    case FINGERPRINT_OK:
      Serial.println("Image taken");
      break;
    case FINGERPRINT_NOFINGER:
      Serial.println("No finger detected");
      return p;
    case FINGERPRINT_PACKETRECIEVEERR:
      Serial.println("Communication error");
      return p;
    case FINGERPRINT_IMAGEFAIL:
      Serial.println("Imaging error");
      return p;
    default:
      Serial.println("Unknown error");
      return p;
  }

  // OK success!

  p = finger.image2Tz();
  switch (p) {
    case FINGERPRINT_OK:
      Serial.println("Image converted");
      break;
    case FINGERPRINT_IMAGEMESS:
      Serial.println("Image too messy");
      return p;
    case FINGERPRINT_PACKETRECIEVEERR:
      Serial.println("Communication error");
      return p;
    case FINGERPRINT_FEATUREFAIL:
      Serial.println("Could not find fingerprint features");
      return p;
    case FINGERPRINT_INVALIDIMAGE:
      Serial.println("Could not find fingerprint features");
      return p;
    default:
      Serial.println("Unknown error");
      return p;
  }

  // OK converted!
  p = finger.fingerFastSearch();
  if (p == FINGERPRINT_OK) {
    Serial.println("Found a print match!");
  } else if (p == FINGERPRINT_PACKETRECIEVEERR) {
    Serial.println("Communication error");
    return p;
  } else if (p == FINGERPRINT_NOTFOUND) {
    Serial.println("Did not find a match");
    return p;
  } else {
    Serial.println("Unknown error");
    return p;
  }

  // found a match!
  Serial.print("Found ID #"); Serial.print(finger.fingerID);
  Serial.print(" with confidence of "); Serial.println(finger.confidence);

  return finger.fingerID;
}

// returns -1 if failed, otherwise returns ID #
int getFingerprintIDez()
{
  char message[16];

  lcd.setCursor(0, 0);
  // print the number of seconds since reset:
  lcd.print("FINGERPRINT ?");

  uint8_t p = finger.getImage();
  if (p != FINGERPRINT_OK)  return -1;

  p = finger.image2Tz();
  if (p != FINGERPRINT_OK)  return -1;

  p = finger.fingerFastSearch();
  if (p != FINGERPRINT_OK)  return -1;

  // found a match!
  Serial.print("Found ID #"); Serial.print(finger.fingerID);
  Serial.print(" with confidence of "); Serial.println(finger.confidence);

  lcd.setCursor(0, 1);
  strcpy(message, "                ");
  lcd.print(message);

  if (finger.fingerID==1 || (finger.fingerID>=6 && finger.fingerID<=8))strcpy(message, "Bienvenue Ludo");
  if (finger.fingerID>=9 && finger.fingerID<=12)strcpy(message, "Bienvenue Enzo");
  if (finger.fingerID>=2 && finger.fingerID<=5)strcpy(message, "Bienvenue Eva");

  lcd.setCursor(0, 1);
  lcd.print(message);

  digitalWrite(transistor, LOW);
  delay(250);
  digitalWrite(transistor, HIGH);
  delay(500);
  digitalWrite(transistor, LOW);
  delay(250);
  digitalWrite(transistor, HIGH);
  delay(500);
  digitalWrite(transistor, LOW);
  delay(250);
  digitalWrite(transistor, HIGH);
  delay(500);
  digitalWrite(transistor, LOW);
  delay(250);
  digitalWrite(transistor, HIGH);

  lcd.setCursor(0, 1);
  strcpy(message, "                ");
  lcd.print(message);

  sprintf(message, "Confidence: %d", finger.confidence);
  lcd.setCursor(0, 1);
  lcd.print(message);
  delay(2000);

  lcd.setCursor(0, 0);
  // print the number of seconds since reset:
  lcd.print("FINGERPRINT ?");

  lcd.setCursor(0, 1);
  strcpy(message, "                ");
  lcd.print(message);


  return finger.fingerID;
}
Voici le projet zippé.

Arduino
Hello World !!!
Publié le 25/11/2018
Commencer à maitriser les entrées/sorties d'un Arduino UNO.
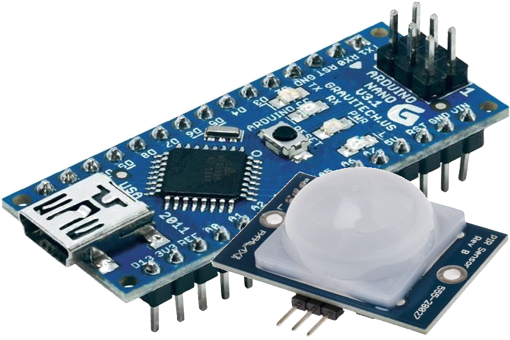
Arduino
Détecteur de mouvement
Publié le 25/11/2018
Détecteur de mouvement à base de PIR
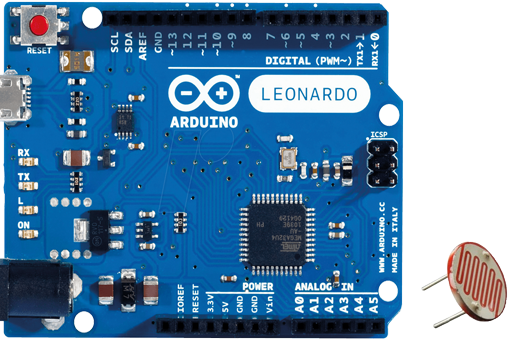
Arduino
Jouer avec la lumière
Publié le 25/11/2018
Jouer avec la lumière
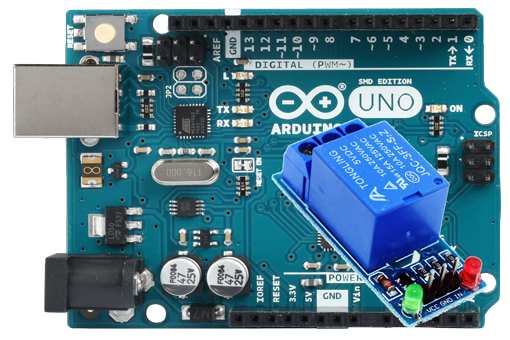
Arduino
Jouer avec un relais
Publié le 25/11/2018
Jouer avec un relais
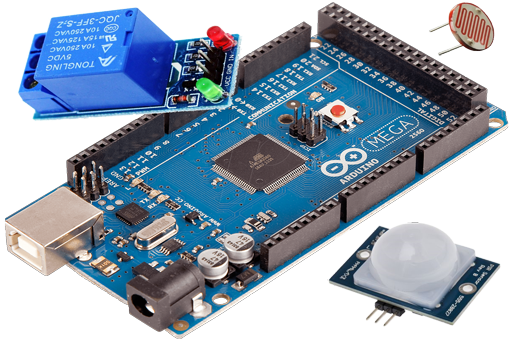
Arduino
Combiner un PIR, une photo-résistance et un relais
Publié le 25/11/2018
Commander un relais suite à la détection d'un mouvement dans l'obscurité.
Arduino
Détecteur de niveau d'eau maison
Publié le 08/12/2018
Le but est de détecter le niveau d'eau de ma piscine, ou de toute cuve, réserve d'eau.
Arduino
VMC automatisée commandée par Arduino UNO en Wifi
Publié le 22/12/2018
Contrôler la VMC de la maison en fonction de la température et de l'hydrométrie.
Arduino
Lumière d'ambiance (ruban LED) contrôlée par Arduino nano
Publié le 22/12/2018
Contrôler la lumière d'ambiance (ruban LED) dans une pièce.
Arduino
Jouer avec les ondes RF (NRF24L01) - Emission
Publié le 23/12/2018
Jouer avec les ondes radiofréquence à base de NRF24L01
Raspberry
Jouer avec les ondes RF (NRF2401) - Réceptions
Publié le 23/12/2018
Jouer avec les ondes radiofréquence à base de NRF2401 - Réceptions
Arduino
Lecteur d'empreinte digitale DY50
Publié le 28/04/2019
Maitriser la lecture des empreintes digitales (DY50).
Arduino
Petit robot chat Tobby
Publié le 05/05/2019
Construction d'un petit robot commandé par le port série de l'ordinateur
Arduino
Mesurer une intensité/puissance avec un capteur de courant SCT013
Publié le 09/05/2019
Mesurer une intensité/puissance avec un capteur de courant SCT013
Arduino
Variateur de lumière (Light Dimmer) pour ampoule 220v
Publié le 11/05/2019
Variateur de lumière (AC Light Dimmer) pour ampoule à incandescence 220v

Arduino
MQ-2: Detecter les gaz environnant
Publié le 13/10/2019
L'objet de ce post est de détecter différents gaz environnant tel que H2, CO, CH4...

Fusion 360
Pattern rectangulaire
Publié le 16/02/2020
Dans ce billet nous allons voir comment créer des patterns rectangulaires.
Fusion 360
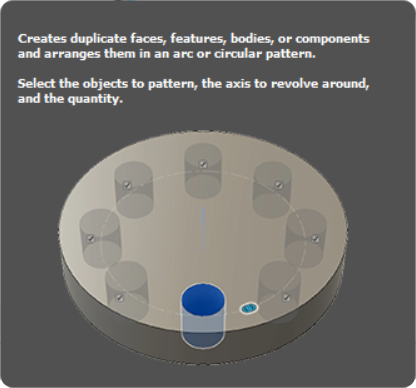
Pattern circulaire
Publié le 18/02/2020
Dans ce billet nous allons voir comment créer des patterns circulaires.
Fusion 360
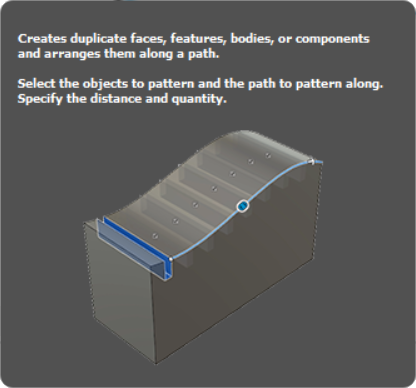
Pattern sur un chemin
Publié le 21/02/2020
Dans ce billet nous allons voir comment créer des patterns sur un chemin.
Forum
Vos avis/remarques...
Veuillez vous connecter pour laisser vos commentaires...
Pour cela vous devrez utiliser un module complémentaire, car en natif les cartes Arduino ne gèrent ni la date, ni l’heure. Voici un exemple de composant: DS1307.
GAUTHIER Ludovic
2019-11-29 22:54:47
Votre code arduino est très intéressant pour nous dans notre projet de fin d'étude.
J'ai une question: comment ajouter l'heure et la date dans le programme ? par exemple le capteur détecte une empreinte donc afficheur LCD affiche la date le nom et l'heure.
Merci
Martin Kevin
2019-11-26 15:25:18
Pour cela, il faut utiliser un autre programme. Ce programme se trouve dans le zip du projet. Il suffit de suivre les instructions.
GAUTHIER Ludovic
2019-04-28 19:47:53
Comment fait on pour enregistrer les empreintes ?